Run a Workflow Task on a Schedule
Scenario
Use this example when a task should be created or executed on a schedule instead of waiting for a user to trigger it manually.
What You Will Learn
- configure recurring schedule rules for a module task
- select an action automatically from task prework
- route the scheduled result to a user role
Difficulty and Estimated Time
- Difficulty: Intermediate
- Estimated time: 20 minutes plus the schedule wait interval
Assumed Knowledge
You should be familiar with module tasks, task actions, prework scripts, and role assignment.
Required Reading
Prerequisites
- permission to create module tasks
- access to task scheduling settings and prework scripting
- a user or role that should receive the scheduled work item
Steps
Create the Process
- Create a new process and open it in edit mode.
- Select the pool.
- Turn the opening task into a module-style scheduled task.
- Create the follow-up user task that will receive the scheduled notification or work.
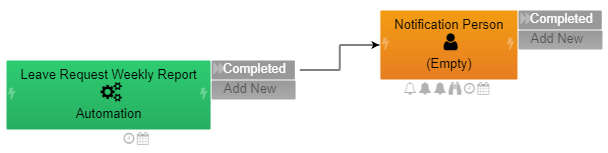
Configure the Schedule
- Open the calendar icon under the scheduled task.
- Enable the schedule.
- Fill the interval and schedule rules according to the required timing.
The example below shows a weekly schedule with an inverted daily range:
1 2 3 4 5 6 7 8 9 10 11 12 13 14 15 | |

Set the Scheduled Action in Prework
Open the prework of the scheduled task and select the action automatically:
1 | |
This lets the scheduled task advance without requiring a manual user click.
Assign the Role
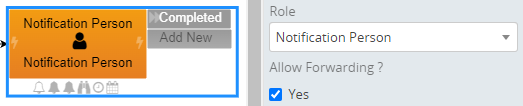
- Add a role for the person who should receive the scheduled result.
- Assign that role to the follow-up task.
Create the Form
- Add the form used by the follow-up task.
- Insert a row-content section.
- Add a message widget or another widget that displays the scheduled content.
Test the Notification Flow
- Commit the process changes.
- Wait for the next scheduled interval.
- Open the worklist and verify that the scheduled task appears for the assigned user.

Result
The process now creates or advances work automatically according to a defined schedule, and routes the resulting task to the intended user or role.
Verify the Result
Use a short test schedule, confirm that one execution creates or advances the expected work, and then restore the intended interval. Observe a second interval to ensure that the process does not create unintended duplicate work.
Security and Portability Notes
- Schedules use the target environment's time zone and calendar configuration; verify both after import.
- Resolve recipients through roles rather than fixed user identifiers.
- If overlapping runs are possible, add an explicit concurrency guard and make writes idempotent.